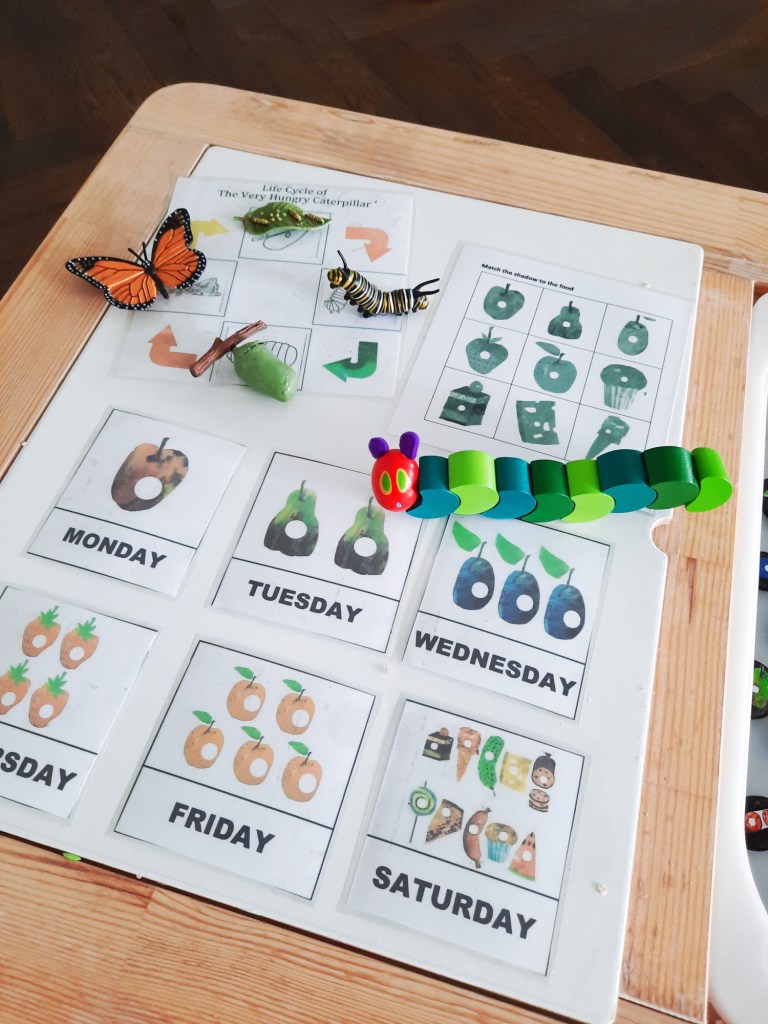
One thing that is always great to have on hand is a sensory box. They don’t have to be complex, but something that will occupy little hands and minds for an hour or so is very useful! As we prepare for a new baby, having an activity that I can grab and set up within a minute was critical, as I’m sure there will be a number of times where both toddler and baby will want my time! Here are 3 DIY sensory boxes I’ve created for our playroom that are already on high rotation.
The Very Hungry Caterpillar
This is a favourite of all children, and a really easy one to expand into sensory play! I purchased a few extra pieces for this box as it’s my son’s favourite, however you could keep it simple and stick to the free printables and story stones! I usually get out our copy of The Very Hungry Caterpillar when we are playing with this set, although my son can recite the book word for word without it!
To buy:
Free printables:
- The Very Hungry Caterpillar story stones
- The Very Hungry Caterpillar shadow match
- Day of the week flash cards
- Life cycle of the Very Hungry Caterpillar


Construction
For any children obsessed with diggers and dozers, this is for them! Use mini construction vehicles to play in the sensory base, with some extras from our toy sets thrown in. For the sensory base I’ve used rolled oats, lentils and river stones. This is a great box to repurpose any signs or people you might have from train sets or lego figures. For only a few dollars, I invested in the paddle pop stick shape printables and this has been a lot of fun. First, let the kids learn to make the shapes, and then let them drive the vehicles on them! I used jumbo paddle pop sticks, coloured them black with a texta and added white dividing lines using correction tape – super simple, but very effective.
To buy (or repurpose from your toy box):
- Mini construction vehicles (I found these at the Reject Shop)
- Construction signs and/or people (I used ones from our train set)
- Jumbo paddle pop sticks
Printables:


Insects
The insects sensory box is probably the EASIEST one of all to put together. All I’ve used is some coloured rice (to make, pour uncooked rice in a large snap lock bag and squirt in some poster paint. Shake around until coated and then pour onto baking tray and let dry in the sun), insects from our ever growing collection of animals, tweezers and a magnifying glass. I created my own printables for this one, firstly by laying out all the insects on a piece of paper and taking a photograph for a “match it up” card. The second printable is just a table with the number of legs of each insect and the child has to count the legs and place in the correct spot. I think the biggest hit with this box is the use of the magnifying glass and tweezers – both of which are from Kmart!
To buy:
- Magnifying glass
- Tweezers (you could also use mini tongs)
- Insects
To make:
- Coloured rice
- Match it up printable
- Count the legs printable


Storage
I love to store these in slimline plastic containers. It fits everything, and then I can pop them into our sensory play table (IKEA Flisat table) when we are ready to play. Packing up is also easy, as everything just gets poured back into the container and stored away on the shelf!


